 |
| © You Want Me to Cook? |
We’ve
had a couple classes of making parts of flowers and leaves. When you’re dealing with ornate flowers, they
have to be made in pieces and then fully dried before assembling and detailing
them.
Tonight,
we pull together almost all of our flowers.
Also, we make some of the other flowers we finished prettier.
Here
is lesson plan for
this course. The red, bold text is what
we covered in the class:
- Blossoms
- Gerber Daisies
- Sweet Peas
- Ivy Leaves
- Lily Leaves
- Briar Rose
- Stargazer Lily
- Stephanotis
- Assemble Blossoms, Leaves and Bouquets
- Using Flower Spikes
We
started the class making the Stephanotis Bud. At first, I thought it was going to be a base
for the Stephanotis flower we were going to be making later in the evening’s
class. I was wrong. Instead it is an unopened version of the
flower to be used as a filler flower in a bouquet. Like in this picture from Plant-Care.com.
 |
| Plant-Care.com |
Anyway,
in almost all bouquets, it is rare that you will have all blooming
flowers. It makes sense to have some
buds that aren’t open yet in your arrangement.
 |
| © You Want Me to Cook? Stephanotis Bud |
And
what lovely buds they are, and yes, I only made one. I had some gum paste issues and only managed
to get one done before we moved on to the next flower.
I
should also point out that the calyx and shading was added later in the class
after the bud had some time to dry.
Also, I jumped ahead because the shading was supposed to happen in the
next class. I just couldn’t wait!
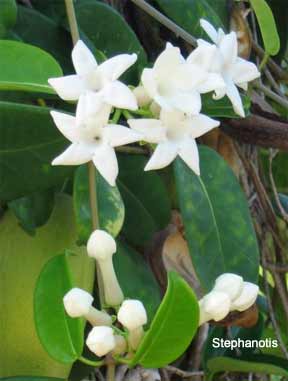
Moving
along, we did the Stephanotis flower. The pictures in the book make the flower seem
like they are much bigger than they are when you’re making them. These tiny little flowers are rolled out
thin, have delicate leaves and start drying almost immediately, so you have to
work fast.
 |
| © You Want Me to Cook? Stephanotis |
 |
| © You Want Me to Cook? Stephanotis |
 |
| © You Want Me to Cook? Stephanotis |
I
have to admit that I love this flower. I
almost wanted to make a bouquet of these my final project, but chickened-out.
 |
| Types-of-Flowers.com |
For now, I made this lovely yellow Sweet Pea.
 |
| © You Want Me to Cook? Sweet Pea |
Full
disclosure: I am writing this after the final class. One of my fellow students made a tiered cake
with these flowers winding up the side.
It. Was. Gorgeous. She’s also
still in high school and said she would send me a picture of the finished project. I’ll update you when I get it.
When
then gave some detail to flowers we made over the past two classes. We shaded our Ivy Leaves and Lily Leaves to
give dimension to the veins.
 |
| © You Want Me to Cook? LilyLeaves |
And
what a difference it made! I like the
flowers before, but if you look at my previous pictures in the last post, you
couldn’t see the elaborate detail that the leaves have. Now you can see the amount of pattern that the
leaves have instead of just the shape.
 |
| © You Want Me to Cook? Ivy Leaves |
Remember
my tiny little Blossoms? What I did do to it was shade it to give it
depth… and sparkles! I had an issue with
my color dust not being dark enough to effectively shade the petal ridges. So I had some pink Pearl Dust from the last
class and decided to use it.
 |
| © You Want Me to Cook? Blossoms |
I
loved the effect it gave these delicate flowers. Before you really couldn’t see the detail, but
it is now popping out of the picture.
Well maybe not POPPING out of the picture, but it definitely makes a
difference.
Finally,
we gave the Briar
Rose a little more dimension and
visual interest.
 |
| © You Want Me to Cook? Briar Rose |
See
how we shaded around the stamen to give the appearance of pollen? Love it!
 |
| © You Want Me to Cook? Briar Rose |
I
can’t believe we only have ONE CLASS LEFT!
I’m excited and disappointed at the same time. I’m excited because I love the challenge of
the final project and we’ll pull all of our flowers together. I’m disappointed because it is the final
class. I’ve really enjoyed taking this
series of classes from Wilton and it forces me to take a break from everyday
tasks and do something fun.
What
will my final project be? As I said, I’ve
already done it, but you’ll have to wait until the next post to see what it
is. So until then… happy decorating!
No comments:
Post a Comment